How to Use Windows Photo Viewer in Windows 10
Windows 10 ($164 at Amazon) has been around for years, and Microsoft just launched Windows 11 in October, adding new features and upgrades. (Here's how to download Windows 11 and our favorite features of the new OS.) You may have noticed that the Windows 10 Photo app is different from the old Windows Photo Viewer, and includes the ability to edit and enhance your images with a couple of clicks. But sometimes the old ways are best.
Even with the upgraded features, some die-hard Windows Photo Viewer fans are finding their way back to their beloved original photo app. Here's how you can make Windows Photo Viewer the default photo app in Windows 10.
Read more: Master Windows 10 in 2020 with these 11 hidden tricks

Now playing: Watch this: Windows 10: Try these hidden features right now
2:51
If you upgraded from Windows 7, 8 or 8.1

It's easy to get the trusty old Windows Photo Viewer back -- simply open up Settings and go to System > Default apps. Under "Photo viewer" you should see your current default photo viewer (probably the new Photos app). Click this to see a list of options for a new default photo viewer. Assuming you upgraded to Windows 10 from a previous version of Windows, you should see Windows Photo Viewer as an option.
Choose Windows Photo Viewer and exit the Settings menu, and you're done -- photos will now open up in Windows Photo Viewer.
Read more from TechRepublic: 20 pro tips to make Windows 10 work the way you want (free PDF)
If you installed Windows 10 from scratch
This is trickier, because while Windows Photo Viewer is still technically available, it's not easy to find. It does involve editing the Windows Registry, which you should not attempt unless you know what you're doing -- editing the Registry can be dangerous if you make a mistake.
Here's how to do it:

1. Copy the code from this post by Edwin over at TenForums into Notepad and save it as a REG file (call it whatever you like, maybe photoviewer.reg).

2. Double-click on your new REG file to merge it with your Windows Registry. You will need to click through the User Account Control and a few other windows to allow the file to make changes to the Registry.
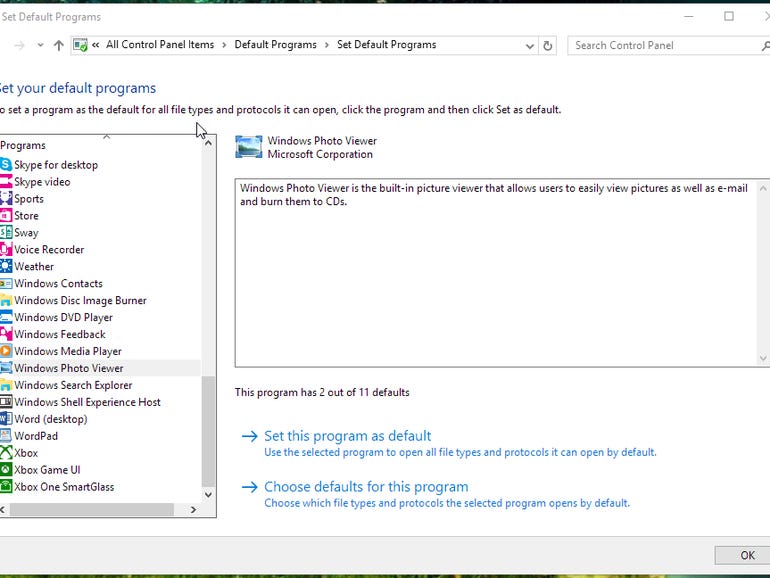
3. You should now be able to see the Windows Photo Viewer and set it as the default program for various image files. To do this, open the Control Panel and go to Default Programs > Set Default Programs. Find Windows Photo Viewer in the list of programs, click it and choose Set this program as default. This will set the Windows Photo Viewer as the default program for all file types it can open by default.
For more on Windows 10, check out everything you need to know about the latest update and6 simple security changes all Windows 10 users need to make.

Now playing: Watch this: How to take Windows 10 screenshots
2:04
How to Use Windows Photo Viewer in Windows 10
Source: https://www.cnet.com/tech/services-and-software/miss-windows-photo-viewer-heres-how-to-get-it-back-in-windows-10/#:~:text=To%20do%20this%2C%20open%20the,it%20can%20open%20by%20default.